Business Benefits
Store your data in a MySQL database.
Create a table in MySQL using a CREATE TABLE statement, where the table will be used to store data in column and row format.
The CREATE TABLE statement allows you to create a new table in a database. Use this syntax:
CREATE TABLE [IF NOT EXISTS] table_name(
column_1_definition,
column_2_definition,
…,
table_constraints
) ENGINE=storage_engine;
```For example:
CREATE TABLE IF NOT EXISTS tasks (
    task_id INT AUTO_INCREMENT PRIMARY KEY,
    title VARCHAR(255) NOT NULL,
    start_date DATE,
    due_date DATE,
    status TINYINT NOT NULL,
    priority TINYINT NOT NULL,
    description TEXT,
    created_at TIMESTAMP DEFAULT CURRENT_TIMESTAMP
)  ENGINE=INNODB;
## Use `CREATE TABLE` with a foreign key and primary key to connect two tables with a common column. Use the primary key to represent a unique row in the table, and the foreign key to connect to a related column in another table.

For example, you might want to create a checklist with associated tasks you can tick off. Each checklist is essentially a collection of tasks. On the database side, first create a table called `tasks` with a primary key of `task_id`. To store checklists of tasks, create a new table named `checklists`, with primary key of `todo_id` and foreign key of `task_id` to connect the tasks table.
CREATE TABLE IF NOT EXISTS checklists (
    todo_id INT AUTO_INCREMENT,
    task_id INT,
    todo VARCHAR(255) NOT NULL,
    is_completed BOOLEAN NOT NULL DEFAULT FALSE,
    PRIMARY KEY (todo_id , task_id),
    FOREIGN KEY (task_id)
        REFERENCES tasks (task_id)
        ON UPDATE RESTRICT ON DELETE CASCADE
);
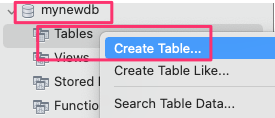
## Create a table using MySQL Workbench visual editor to avoid writing a query from scratch.
1. Right-click on ***[database name] > Tables*** and select ***Create Table...***.
2. Enter a name for the table, and define the columns needed.
Note: ***AI*** means auto increment. Tick ***AI*** if you would like the value to be automatically incremented when a new row is created in the table.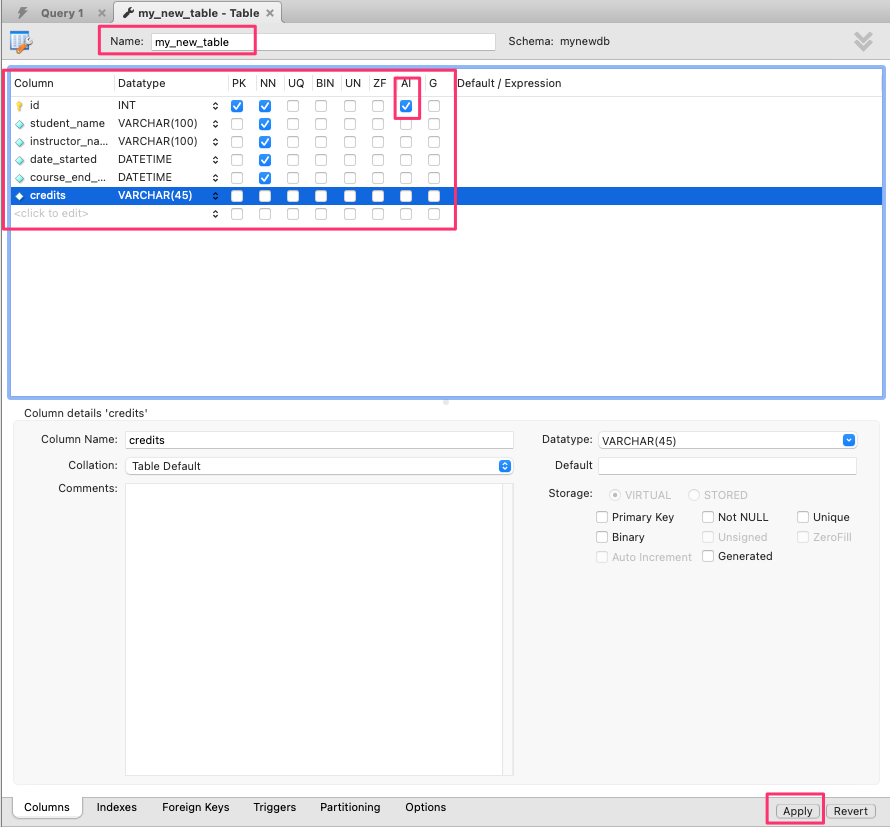
3. Click ***Apply***, review the SQL, and click ***Apply*** again.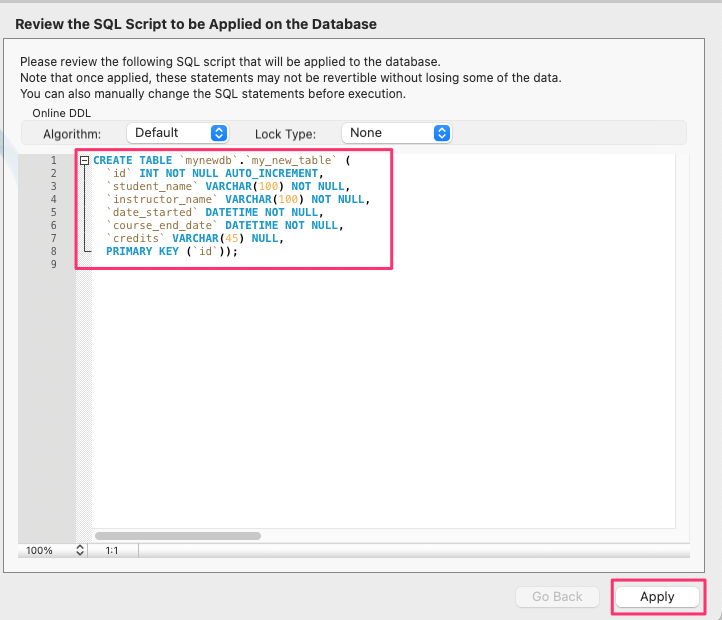
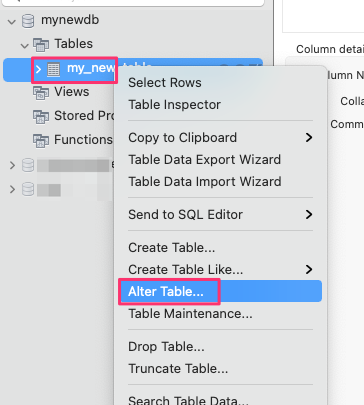
## Right-click on a table and select ***Alter Table...*** to add more columns to it. You might need to do this when the application usage grows and you want to store more data and attributes in the same table.
**Alter** allows you to add or remove columns from the table.
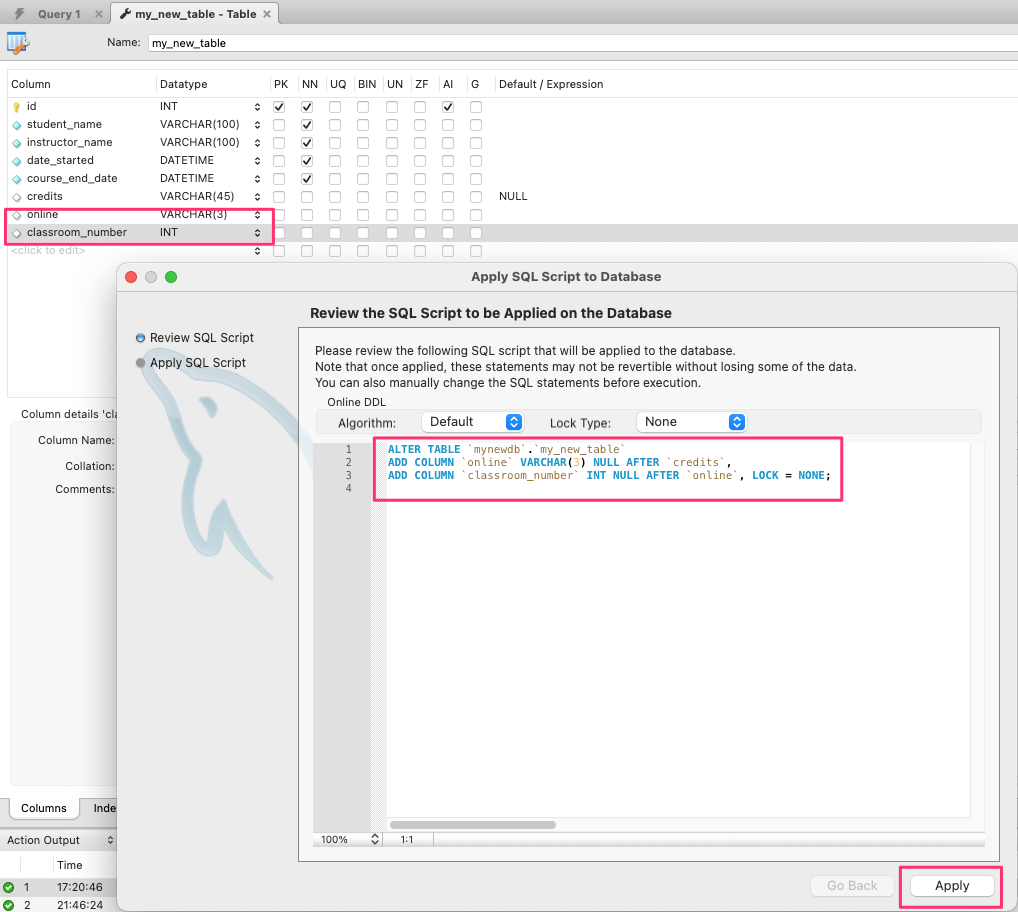
1. Add the new columns and click ***Apply***.
2. Review the SQL syntax and click on ***Apply*** to add the new columns to the table.
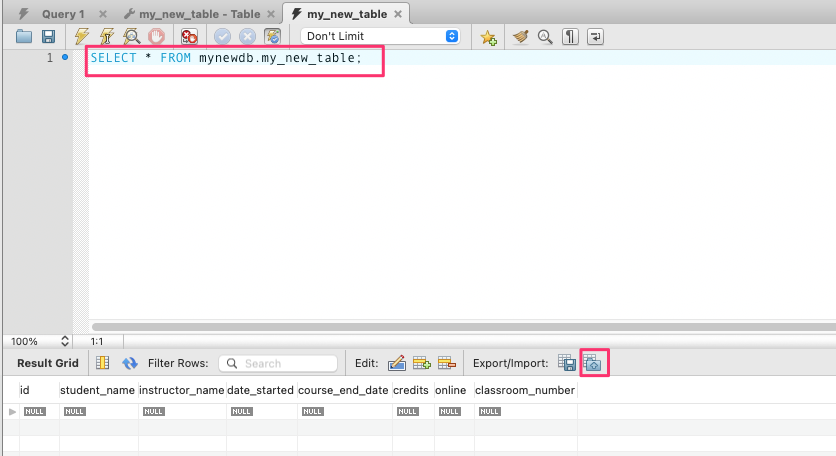
## Import data from a CSV file into a table using MySQL Workbench's import feature, which is intuitive and simple.
1. Check before importing that the CSV file columns match the columns in the table you are importing to, and the data types also match.
2. Select the records from the table using a select statement: `select * from [table_name]`.
3. Click on the import icon, and choose a CSV file to import.
Last edited by @hesh_fekry 2023-11-14T11:07:48Z